


How to Measure and Fit Breast Pump Flanges

Determining the correct breast pump flange fit isn’t just about measurements; it also depends on your comfort during each pumping session. If pumping has left your nipples sore, your sessions longer than they should be, or your milk output disappointing, that discomfort isn’t just “part of the process.”
Research in the Journal of Human Lactation found that when women used flanges sized closer to their actual nipple diameter, they not only reported significantly greater comfort, but they also expressed more milk per session compared to standard-fit sizes (average difference = 15 g per session). A flange that fits right should let your nipple glide inside the tunnel without pinching or rubbing, and only a little areola should be drawn in.
When it doesn’t, pain can build, and your pumping rhythm and peace of mind can suffer. In this blog, we’ll discuss how to measure accurately, signs of a correct fit, and the step-by-step process to choose the right flange for better comfort and milk flow.
Key Takeaways
- Proper flange fit boosts comfort, protects nipples, and improves milk output; small tweaks can make a big difference.
- Measure each nipple in millimeters and add 2–4 mm to find the most comfortable size, considering brand and material.
- Test flanges on low suction to check comfort, smooth movement, and steady milk flow.
- Pain, rubbing, discoloration, or a low output signal may indicate that a flange may be too small or large; simple adjustments often fix it.
- Maintain, replace when needed, and track insurance-covered supplies for safe, hygienic, and effective pumping.
Why the Right Breast Pump Flange Can Make Pumping Pain-Free
Think of the flange (also called a breast shield) as the part of your pump that actually meets your body. It’s the funnel-shaped piece that goes over your nipple and areola while you pump, and yes, this one piece can completely change how pumping feels for you.
If pumping hasn’t felt the way you expected, it’s completely okay to question the fit. You’re not doing anything wrong. You’re just learning what works for your body.
Also read: Elvie Pump vs Elvie Stride: A Realistic Comparison for Breast Pumps on the Go
Now that you understand what a flange is and why proper fit matters, the next step is learning how to measure your nipple accurately to find the size that works best for you.
Step-by-Step: How to Measure Your Nipples to Find the Perfect Flange

Getting the right flange size starts with measuring the nipple itself, not the areola. This step matters more than most moms are ever told. Your nipples can be different sizes, and that’s completely normal, which is why measuring both sides gives you a more accurate starting point.
This process requires no specialized tools or medical training and can be done safely at home. Let’s have a look!
Step 1: Pick The Right Moment
Measure when your nipples are relaxed and at rest, not stretched from pumping. This gives you a true starting size. If things feel different later on (swelling, soreness, changes in supply), it’s okay to measure again; bodies change, and this step can change with you.
Step 2: Gather Your Tools
You only need a few basics:
- A ruler with millimeters (mm)
- A printable nipple-measuring guide (if you have one)
- Good lighting so you’re not guessing
Step 3: Measure The Nipple Itself
Gently encourage the nipple to stand out naturally. Measure straight across the middle of the nipple shaft, not the base and not the surrounding skin. Keep the ruler perpendicular, like drawing a straight line across a circle.
Step 4: Write Both Numbers Down
It’s common for each side to be different.
Example:
- Left: 17 mm
- Right: 18 mm
That’s information, not a problem.
If you’re unsure which pump fits your needs, ICBP can help match you with an insurance-covered breast pump from top brands like Medela or Spectra, delivering comfort and support directly to your door.
Now comes the part that usually causes the most confusion, and we’re going to keep it very simple: the size calculation rule.
Calculate Your Ideal Flange Size: Size Calculation Rule (Brand-Neutral)
Your flange size is not the same as your nipple measurement. Your nipple requires a small amount of space inside the flange tunnel to allow natural movement, accommodate different materials, and prevent rubbing.
The Simple Rule Most Brands Follow
- Take your nipple measurement
- Add 2–4 mm
That’s it.
Why the range?
- Softer silicone flanges need slightly less space
- Hard plastic flanges usually need a bit more
- Every brand designs tunnels a little differently
Example Mapping (So You’re Not Guessing)
- Nipple measures 16 mm → Try an 18–20 mm flange
- Nipple measures 17 mm → Try a 19–21 mm flange
- Nipple measures 18 mm → Try a 20–22 mm flange
There isn’t one “perfect” number; you’re narrowing down the most comfortable range.
Common Flange Size Conversion Guide:
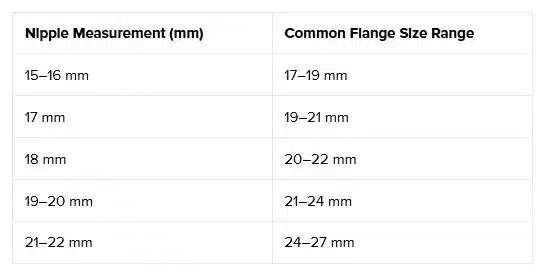
Note: Some brands label sizes slightly differently. Always check the brand’s sizing chart when choosing between two options.
Also read: How to Survive Postpartum Life
Once you’ve measured your nipple and identified a starting flange size, the next step is seeing how should the breast pump flange fit, both visually and by how it feels during pumping.
How Should the Breast Pump Flange Fit? Key Signs to Look For
Here’s the goal you’re aiming for: your nipple stays centered, glides comfortably, the surrounding skin stays mostly outside the tunnel, and nothing feels pinchy or forced. If pumping feels calm and predictable, you’re probably close to the right fit.
Signs You’re Wearing The Right Flange:
- Pumping feels comfortable, not tense or distracting
- Your nipple moves smoothly in and out without scraping the sides
- Milk begins flowing within a reasonable time
- You finish pumping without soreness or swelling
- Your nipples should not appear unusually changed, bruised, or swollen after pumping
Immediate Red Flags To Pay Attention To:
- Sharp, stabbing, or burning pain while pumping
- Nipples turning white, very pale, or deep purple afterward
- A “pinched” or tugging sensation that doesn’t ease
- Skin is being pulled far into the tunnel
- Immediate discomfort that subsides only when pumping stops indicates an improper fit
If you notice discomfort or irregular sensations, consider it a signal to reassess your flange fit.
Knowing how should the breast pump flange fit, next, you’ll want to confirm that it fits in real time by testing it with your pump.
Best Way To Confirm Fit: Measure, Then Test With A Pump
Think of flange fitting as a two-part check, not a one-and-done decision. Measuring gives you a strong starting point, but how your body responds while pumping is what truly confirms whether the fit works for you.
The “Measure + Test” Approach (Why Both Matter):
- Measuring at rest helps you narrow down the right size range without swelling or stretching getting in the way
- Testing while pumping shows how your nipple actually behaves during movement, suction, and milk flow
- Clinical lactation guidance supports observing fit during active pumping, because comfort and milk expression can change once suction is applied
How To Test Fit While Pumping (Multiple Ways To Check):
- Low-suction test: Start pumping on the lowest comfortable suction. Watch how your nipple moves before increasing intensity.
- Movement check: Your nipple should glide in and out smoothly, not drag along the sides or feel stuck.
- Time-to-flow check: Milk should begin flowing without excessive waiting, straining, or discomfort.
- Comfort check: Mild pulling is normal. Sharp pain, stinging, or pinching is not.
- After-pump check: Look at your nipples once you’re done. They should not appear pale, white, or swollen.
Some moms also find it helpful to briefly try one size up or down (on low suction) to compare how each feels before settling on the most comfortable option.
Now, let us have a look at some signs that indicate your flange is too small or too large.
How to Tell if Your Flange is Too Tight or Too Loose (and What to Do)

Sometimes your body gives clearer feedback than a measuring tool ever could. If something feels off, these side-by-side clues can help you figure out what’s happening and what to try next.
What It Looks Like When The Flange Is Too Small
- Your nipple rubs or scrapes the tunnel walls
- Pumping feels tight or stingy instead of smooth
- Nipples look white or very pale after a session
- You feel relief the moment you stop pumping
For example, if your nipple turns white after pumping and remains sore, the flange may be too tight.
What usually helps:
- Move one size up
- Lower suction while testing the new size
What It Looks Like When The Flange Is Too Large
- Too much surrounding skin is pulled into the tunnel
- Pumping feels awkward or tug-heavy
- Milk flow feels slower than expected
- Nipples may look stretched or puffy afterward
Real-life moment: If it looks like half your areola is being pulled in but milk output is low, the flange may be oversized.
What usually helps:
- Try one size down
- Check comfort again on low suction
If you’re unsure which side you fall on, that’s okay. Many moms land in between sizes and need a little experimenting to find their sweet spot.
Also read: Everything You Need to Know About Ameda Pumps
It’s also important to consider how wearable and hands-free pumps change the rules for flange fit and comfort.
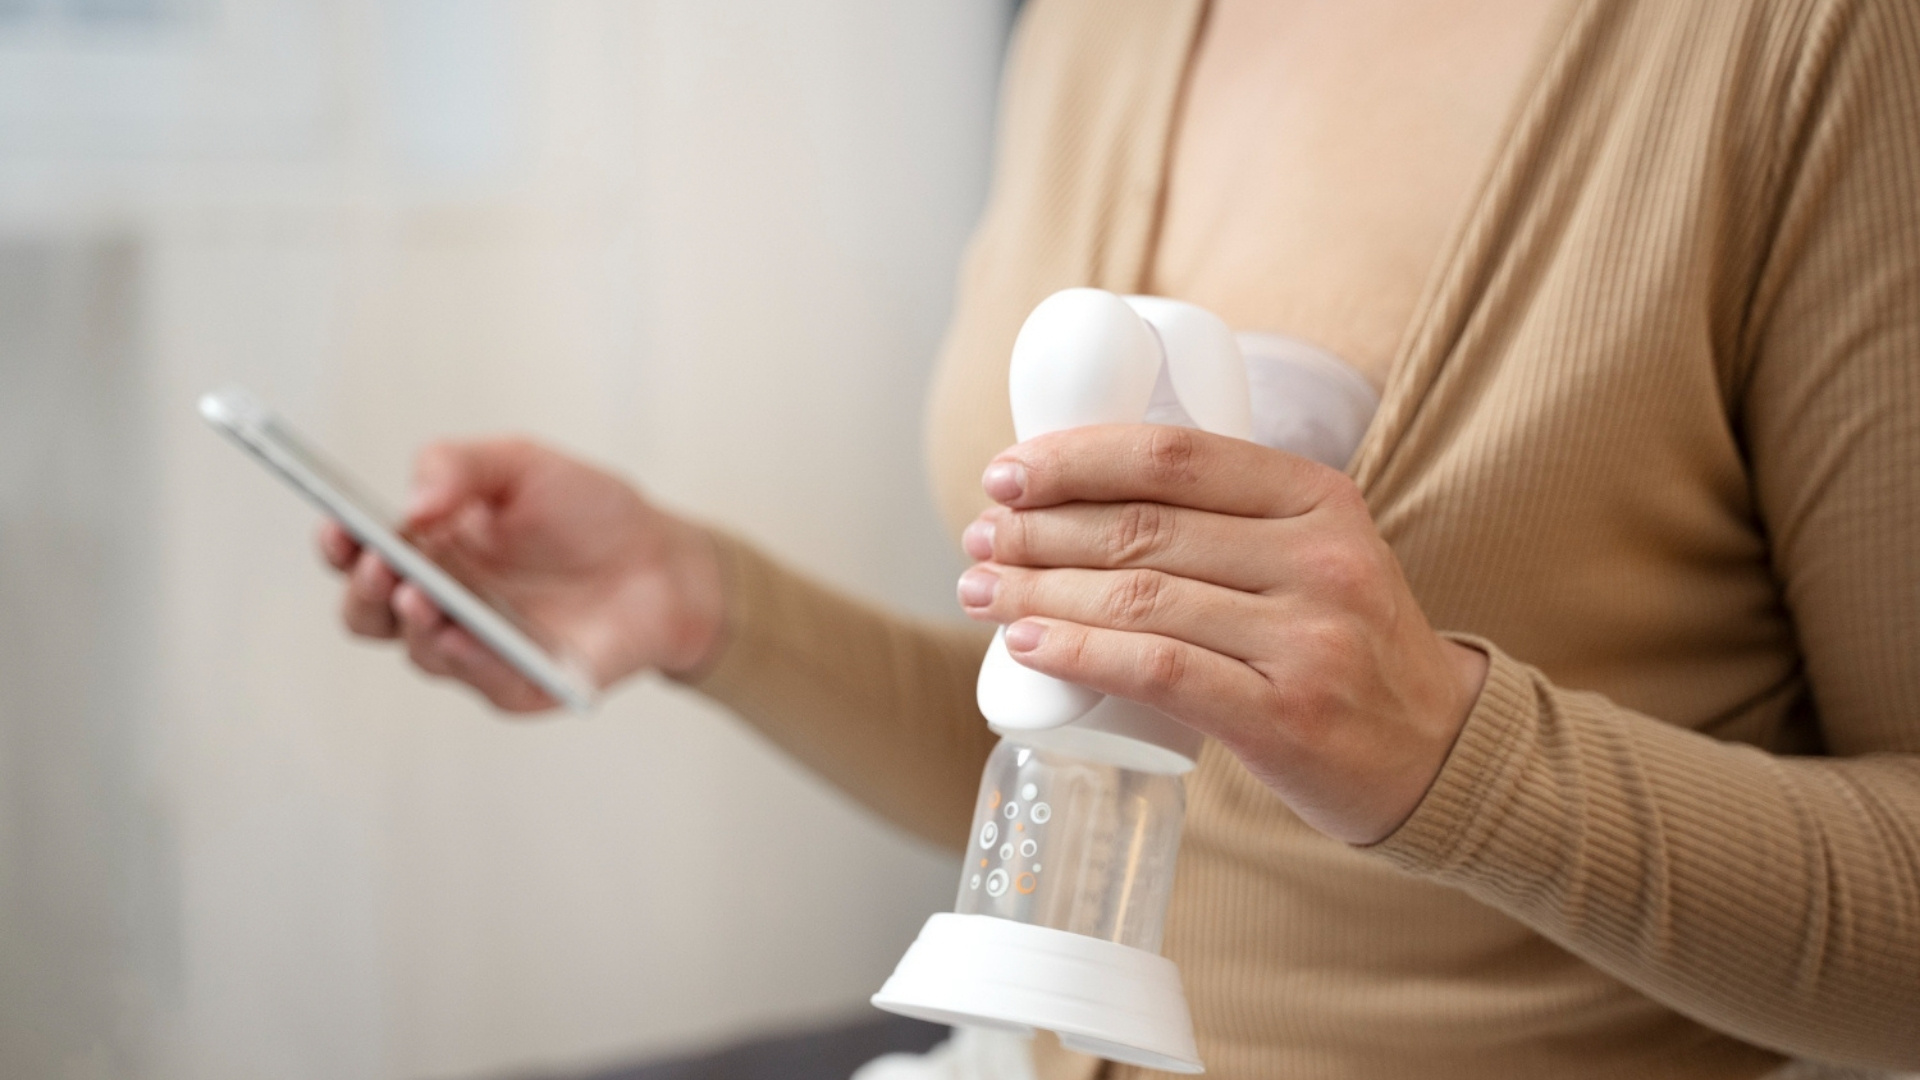
Choosing Flanges for Wearable & Hands-Free Pumps: What You Must Know
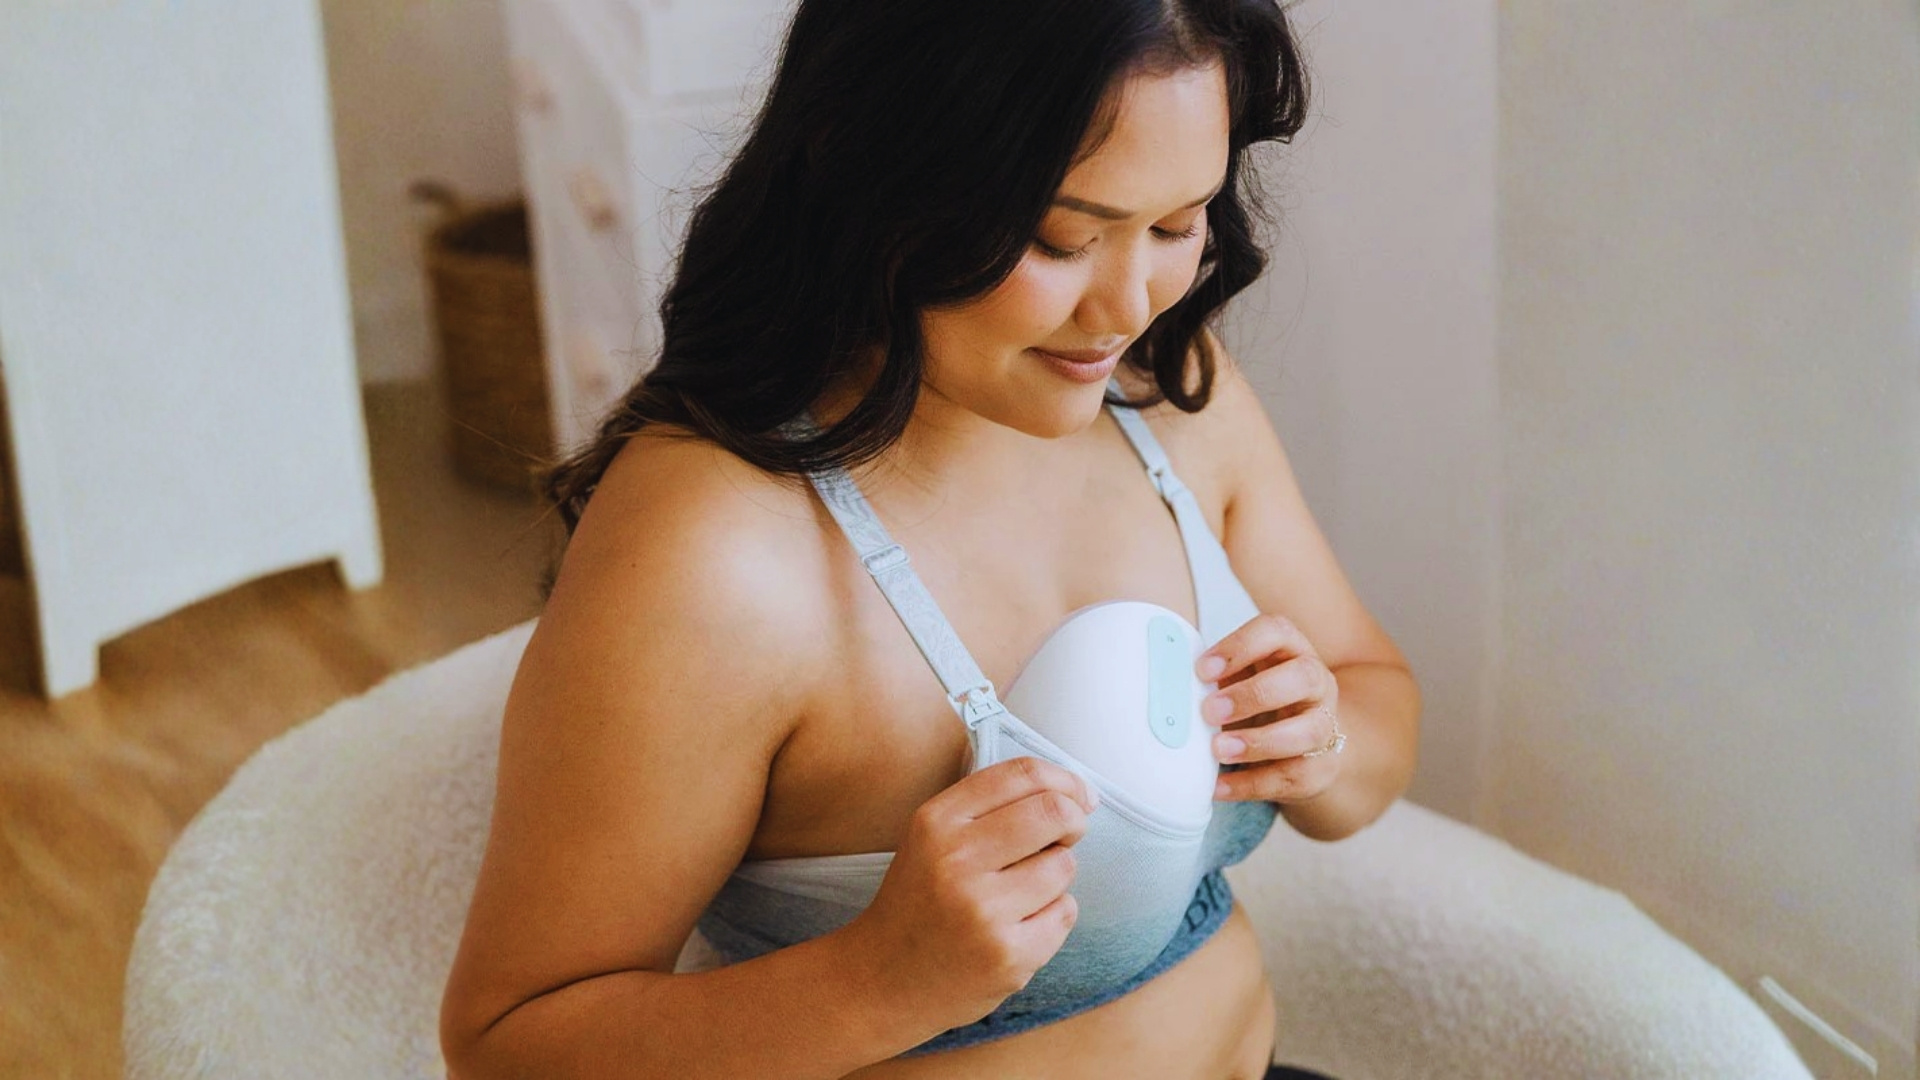
Wearable pumps play by different rules. Because they sit inside your bra and move with your body, their flange systems are designed to be softer, lower-profile, and more flexible than traditional setups.
What’s Different With Wearables:
- Built-in sizing systems: Many wearables rely on inserts that snap into a single shell rather than multiple hard flange sizes
- Silicone-first design: Softer materials help create a seal while you move, bend, or multitask
- Shallower tunnels: Space is limited, so fit precision matters even more
Compatibility Matters More Than You Think:
Not all parts mix and match here. Inserts or adapters made for standard pumps don’t always work well with wearables, and swapping components across brands can affect comfort, seal, or milk flow. What works for one system may feel completely wrong in another.
One Smart Rule To Follow:
With wearables, stick closely to the brand’s sizing guidance. If a manufacturer recommends specific inserts or advises against adapters, it’s best to follow that advice, especially for hands-free systems like Elvie or Willow.
Wearable and hands-free systems have unique fit requirements, so flange sizing may need periodic adjustment. Here’s when and why you may need to remeasure over time.
When and How to Remeasure Your Flanges as Your Body Changes
Flange sizing isn’t something you set once and forget. Your body continues to adjust as you move through different stages of breastfeeding, and your pump setup needs to keep up with those changes.
Moments When Remeasuring Makes Sense
- After episodes of swelling or mastitis (a breast infection that can cause pain, swelling, warmth, and sometimes fever)
- As your body settles into the postpartum period
- When your pumping routine changes, like returning to work
- If milk supply shifts or sessions start feeling different
Helpful Timing Checkpoints
- Around 2–4 weeks postpartum, once early changes begin to stabilize
- Anytime you experience tenderness, inflammation, or blocked ducts (milk duct that gets clogged, causing a tender lump in the breast)
- When you transition from occasional pumping to a more regular schedule
If something that once felt comfortable suddenly doesn’t, that’s your cue to pause and reassess, not push through discomfort.
For a deeper look at how your body continues to change after birth, the Mama Talk guide on Postpartum Body Changes offers helpful context on what’s normal and when adjustments are needed.
While regular remeasurement helps keep pumping comfortable, certain signs may indicate a more serious issue. Here’s when fit could signal a need for professional attention.
Clinical Safety: When Fit Could Indicate A Problem

Most fit issues are fixable with small adjustments, but sometimes your body is signaling that it needs extra care, not more trial and error. These signs are worth taking seriously.
Pause Pumping And Consult a Healthcare Professional If You Notice:
- Severe or worsening pain that doesn’t improve with size changes
- Bleeding nipples or open cracks that don’t heal
- Color changes like deep purple, blue, or persistent whitening after pumping
- Repeated plugged ducts in the same area
- Signs of infection, such as redness, warmth, fever, or flu-like symptoms
If any of these sound familiar, it’s not a failure on your part; it’s a signal to get support.
Now, let us have a look at practical maintenance and replacement guidelines.
How to Maintain and Replace Flanges for Safe, Effective Pumping
Keeping your flanges and pump parts in top shape is less about perfection and more about simple, consistent habits. Think of it like giving your gear a little TLC so pumping stays comfortable and effective.
Clean Like A Pro
- Wash every part that touches milk with warm, soapy water after each use.
- Rinse well and let air-dry; avoid towels that can leave fibers behind.
- Some brands let you boil or steam certain parts; check your manufacturer’s instructions.
- Dishwasher-safe? Only if the brand confirms it, and ideally on the top rack.
Spot The Signs To Replace
- Cracks, chips, or warping
- Discoloration or cloudiness that doesn’t wash off
- Loss of seal or fit, even slight gaps, can reduce milk flow
- Quick tip: Inspect your flanges monthly, and swap out anything that looks worn before it becomes uncomfortable.
Store Smart
- Keep everything dry before storing to avoid mold or odor
- Use a clean container or dedicated bag to protect from dust or kitchen splashes
- Avoid leaving parts in direct sunlight or damp areas
A little routine goes a long way: clean, check, and store, and your pump will keep running smoothly while keeping you comfortable.
Beyond maintenance, insurance-covered breast pumps (ICBP) can further support your comfort, access to supplies, and professional guidance.
How Insurance Covered Breast Pumps (ICBP) Can Help
If you’re juggling the costs of breastfeeding supplies, an insurance-covered breast pump (ICBP) can be a huge relief. Beyond the pump itself, some plans may include accessories, replacement parts, and professional lactation support, all designed to help you pump comfortably and confidently without the added financial stress.
Below Are Key Ways ICBP Can Support You:
- Accessory Coverage: Some plans reimburse flanges, valves, tubing, and inserts, reducing the need to purchase extras out-of-pocket.
- Replacement Flexibility: Certain insurers allow periodic replacement of worn or damaged parts, so your pump stays safe and effective.
- Professional Support: Many ICBP programs include access to IBCLCs or lactation consultants, helping you troubleshoot fit, output, and comfort issues.
- Return and Exchange Policies: Covered pumps often come with guidance for exchanging or upgrading if the supplied model doesn’t meet your needs.
- Streamlined Documentation: Insurers may accept simple logs of flange sizes, measurements, and usage notes to support reimbursement claims.
Read Next: How to Get Free Enfamil Formula for Premature Babies
With insurance-backed support in place, you can focus on comfort and efficiency, bringing everything full circle toward a smoother pumping experience.
Conclusion
Finding the right flange fit isn’t just about comfort; it can transform your entire pumping experience. When your pump feels good and works efficiently, you reduce stress, protect your nipples, and may even improve milk output. Remember, bodies change, so revisiting measurements and fit as you go is perfectly normal.
Insurance Covered Breast Pumps (ICBP) can support this process by helping you access insurance-covered breast pumps, flange sizes, inserts, and replacement parts, so you can maintain a proper fit as your needs change over time.
Verify your insurance coverage to see which breast pumps and accessories are covered under your plan and get guidance on accessing replacement supplies when needed.
FAQs
1. Can I use one flange size for both breasts?
No, not always. Nipples can differ in size between breasts, which means using the same flange for both may cause discomfort or reduce milk output. Measuring each nipple separately and choosing the best-fitting size for each ensures comfort, proper suction, and more effective milk expression.
2. Do nipples change size during pumping sessions?
Yes, nipples can swell slightly or stretch under suction during pumping. This is normal and why observing fit while pumping is important. A flange that fits at rest may feel different during active pumping, so testing on low suction first helps confirm comfort and prevents rubbing or pinching.
3. Is there such a thing as elastic nipples and does that affect fit?
Some nipples stretch more than average under suction, which can make a previously “correct” flange feel tight. Elasticity can vary between sessions, too. Choosing a slightly larger or flexible silicone flange often improves comfort and prevents rubbing, irritation, and reduced milk flow while pumping.
4. Can I measure for flange size while I’m pregnant?
You can measure, but the results are only an estimate. Nipples change postpartum as milk comes in and hormones shift, so your final flange size may differ. It’s a good way to familiarize yourself with measurement techniques, but plan to remeasure once pumping begins to ensure an accurate, comfortable fit.
5. Are some materials (silicone vs plastic) better for comfort?
Silicone flanges tend to be softer and more flexible, reducing rubbing and pinching. Rigid plastic flanges offer a consistent shape and suction, but can feel harsher. Personal comfort and nipple sensitivity dictate the choice; testing both can help determine which material works best for long-term pumping sessions.