


How to Repair and Replace Breast Pump Parts
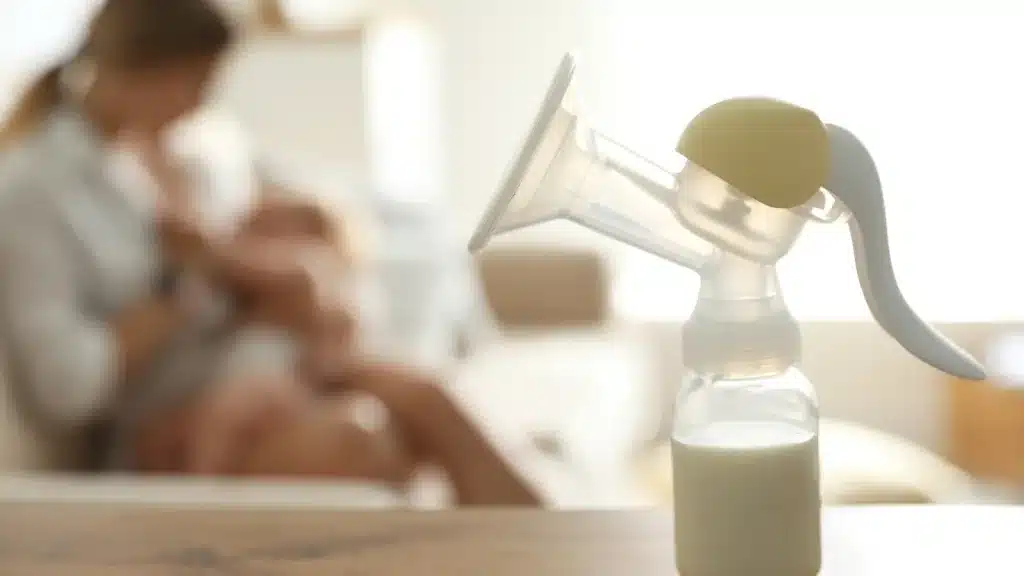
Your breast pump is one of the quiet heroes in your feeding journey. Whether you’re pumping daily at work or just building a freezer stash, keeping your pump in good shape helps protect your milk supply and your peace of mind.
But even the best pumps go through wear and tear. Suction might drop. A tiny valve might crack. Many of these issues are easy to fix, and you don’t need to be an expert to do it.
In this guide, we’ll walk through how to spot early signs of damage, repair common problems, and replace key parts like flanges, tubing, and valves. We’ll also share simple tools, test tips, and where to get trusted replacement pieces, so you can get back to pumping with confidence.
Key Takeaways
- Regular inspection and replacement of parts like duckbill valves, membranes, and tubing help maintain optimal suction and hygiene.
- Signs like decreased suction, unusual noise, or discoloration mean it’s time to inspect or replace parts.
- Keep a full spare set of pump parts to avoid interruptions or last-minute replacements.
- Check with your insurance provider; many plans cover replacement parts, reducing out-of-pocket expenses.
- Proper cleaning, storage, and regular checks help extend the life of your pump and improve performance.
Why Breast Pump Repair and Replacement Parts Are Essential?
Over time, even with regular cleaning, certain pieces can stretch, wear down, or lose their seal, and that can affect everything from suction strength to milk output.
Here’s why keeping tabs on your parts really matters:
- Suction drops when parts wear out. A small tear in a valve or a loose connection in tubing can make your pump feel weaker than usual.
- Old parts can cause discomfort. Worn flanges or stretched-out membranes may not fit or function properly, making pumping less efficient and more frustrating.
- Milk hygiene and safety are impacted. Cracks or trapped residue can lead to mold or bacteria growth, something no pumping mom wants to deal with.
- You’ll save money in the long run. Replacing a $10 valve is often all it takes to avoid replacing the whole pump or dealing with low output worries.
Staying ahead of part wear keeps your pumping sessions smooth, safe, and stress-free.
What Breast Pump Parts to Replace, and When?
Even the best pumps need a little upkeep. While some parts can last months, others wear down quickly with daily use. Knowing what to replace, and how often, can make all the difference in your milk output and comfort.
Here’s a quick breakdown:
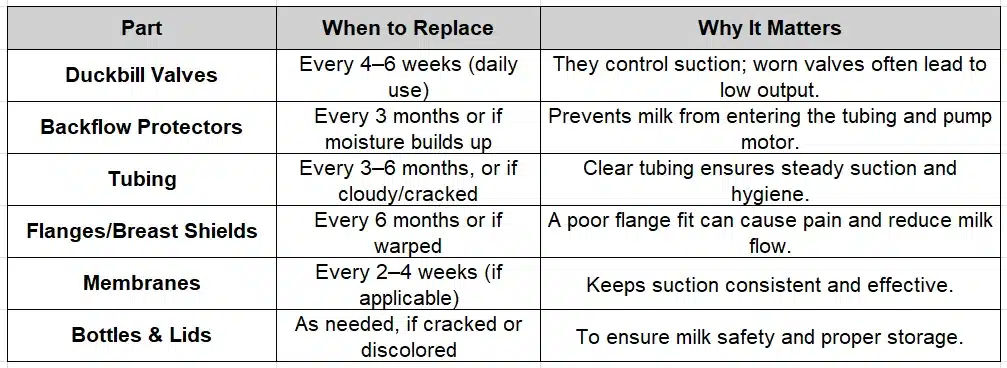
Note: If you’re pumping multiple times a day, consider replacing parts more frequently.
Spare Parts and Emergency Back-Up Parts
Making sure your breast pump is in good working condition is essential, but having a set of spare parts can be just as important.
We recommend keeping at least one full set of replacement parts on hand for emergencies. That way, if something goes wrong, you won’t have to scramble or miss a pumping session.
Extra parts also make daily pumping less stressful. Many moms find it helpful to have one set at home and another in a diaper bag or work tote, especially if you’re pumping on the go.
Having backups isn’t just about being prepared; it’s about giving yourself a little more ease in your day.
How to Dispose of Old Breast Pump Parts?
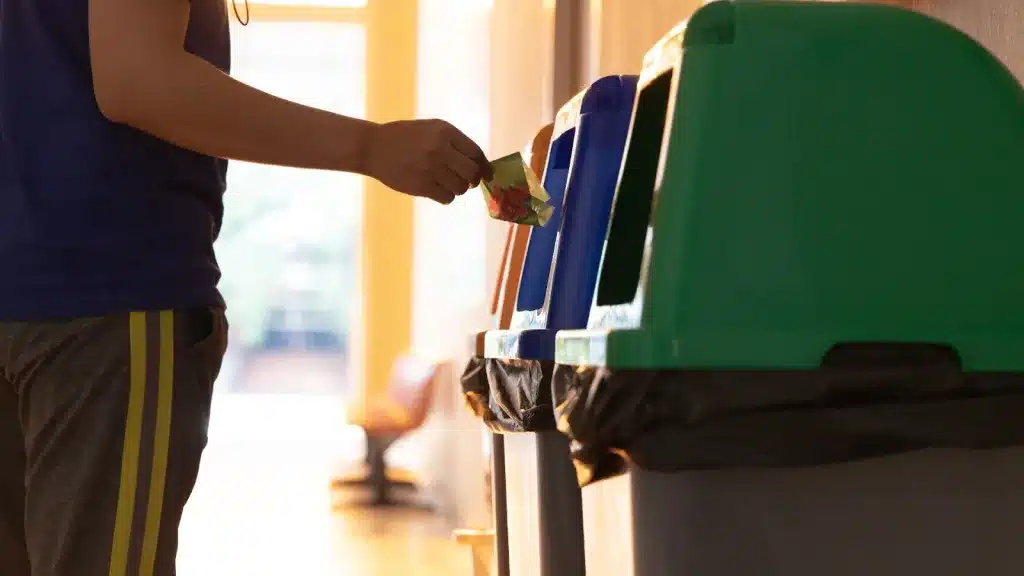
When it’s time to say goodbye to worn or damaged parts, it’s important to dispose of them properly and safely:
- Check the packaging or brand website: Some parts may be recyclable, especially if they’re BPA-free plastic. Look for recycling symbols on bottles, flanges, or connectors.
- Recycle when possible: If your local recycling center accepts #5 plastic (often used in pump parts), clean the pieces thoroughly and drop them off.
- Trash items that can’t be recycled: Silicone valves, membranes, and tubing often aren’t recyclable. Seal them in a bag before tossing to prevent contamination.
- Avoid reusing worn parts: Even if they look “okay,” stretched valves or old flanges can affect suction and milk flow. It’s safer to replace than to reuse.
If your pump is no longer functional, some brands or third-party services offer pump recycling programs. It’s worth checking with the manufacturer!
Reducing the Cost of Pumping: Insurance and Smart Planning
Breast pump parts may seem small, but their costs can add up fast. Over a year, replacement parts like valves, membranes, and tubing can cost anywhere from $50 to over $400, depending on your pump brand and how often you pump.
Considering all the expenses of motherhood, from diapers to daycare, it’s worth checking if your health insurance can cover some or all of these parts.
Here’s what to keep in mind:
- Some insurance plans offer free replacement parts every 60–90 days.
- You may be eligible for full or partial coverage through providers like Insurance Covered Breast Pumps.
- FSA/HSA funds can often be used for valves, tubing, bottles, and more.
It’s always okay to ask your insurer what’s covered, you might be surprised how much support is available. Because the last thing you need is to stress over supplies when you’re focused on feeding your baby.
Final Thoughts
Caring for your breast pump is more than just upkeep; it’s an act of care for yourself and your baby. Whether you’re replacing a worn valve or keeping spare parts for peace of mind, these small steps can make a big difference in how supported and prepared you feel on your pumping journey.
You don’t have to manage it all alone. If you’re ever unsure about a part, a sound, or a drop in suction, reaching out to a lactation consultant or your pump provider can bring reassurance and clarity.
Because you deserve more than just a functioning pump, you deserve ease, comfort, and the confidence that your tools are working with you, not against you.
FAQs
1. How often should I replace my breast pump parts?
Most parts like duckbill valves and membranes should be replaced every 4–8 weeks, depending on use. Flanges, backflow protectors, and tubing may last longer but should be replaced at the first signs of wear.
2. What are the signs that a part needs to be replaced?
Look for reduced suction, visible cracks, stretching, discoloration, or an unusual noise during pumping. If milk output drops and nothing else has changed, the parts may be worn out.
3. Can I use third-party replacement parts with my pump?
Some moms do, but it’s safest to use parts made by or approved for your specific pump model. Off-brand parts may affect performance or void your warranty.
4. Do I need spare parts, or is one set enough?
Having at least one full extra set is highly recommended. It helps in emergencies, makes cleaning easier between sessions, and is especially helpful for working or on-the-go moms.
5. Are replacement parts covered by insurance?
Some insurance plans do cover replacement parts. It depends on your provider and plan. Check with your insurance or use a provider like Insurance Covered Breast Pumps to verify coverage.
6. How do I safely dispose of old or broken pump parts?
Many parts can’t go in curbside recycling. Check with your local recycling center for plastic guidelines. Some brands also offer take-back or recycling programs for used parts.